
Reverse osmosis systems are a great way to get purified water for your home, but regular maintenance is key. Let’s look at how to change reverse osmosis filters, which is a key part of maintaining your RO system.
Table of Contents
- Gather Necessary Tools and Supplies
- Identify and Locate Your RO System’s Components
- Step-by-Step Instructions for Changing Filter Cartridges
- Tips and Troubleshooting
- Maintenance Schedule and Record-Keeping
- How to Replace the Reverse Osmosis Membrane
- Conclusion
Gather Necessary Tools and Supplies
Before you start replacing the filters in your reverse osmosis system, it’s important to gather all the necessary tools and supplies. This will make the process go more smoothly and help avoid any interruptions. Here’s what you’ll need:
- Replacement filters: Make sure you have the correct filters for your specific RO system. This typically includes sediment pre-filters, carbon block filters, and a new RO membrane if it’s time to replace it. Check your owner’s manual or look up the model number online to get the right parts.
- Filter housing wrench: Many RO systems come with a specialized wrench to help unscrew the filter housings. If you don’t have the original, a standard pair of channel lock pliers can often work.
- Bucket and towels: Have a bucket ready to catch any water that spills out when removing the old filters. Some towels are also handy for wiping up drips and keeping your workspace clean.
- Sanitary gloves (optional): If you want to avoid touching the filters and getting carbon residue on your hands, a pair of disposable gloves can help.
- Scissors or utility knife: You may need to cut open the packaging on the new filters and trim the tubing if you’re replacing the RO membrane.
- TDS meter (optional): A handheld TDS meter is useful for testing the water before and after replacing the filters to verify the system is working properly.
Once you have all your tools and supplies ready to go, you can shut off the water supply and depressurize the system to begin the filter change process. Taking a few minutes to get organized up front will make the whole job easier.
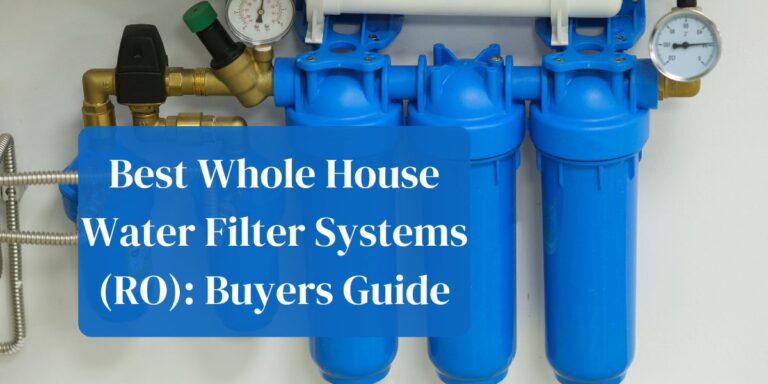
Identify and Locate Your RO System’s Components
Before starting the filter replacement process, it’s important to identify and locate the various components of your reverse osmosis system. This will make the process go more smoothly and help you understand how everything works together. Here’s a quick overview:
- Pre-filters: These are the filter housings before the RO membrane. Most systems have 1-3 pre-filters that remove sediment, chlorine, and other contaminants. They are typically mounted vertically.
- RO membrane: The heart of the system, this is usually the horizontal filter housing. It contains the semipermeable membrane that removes the majority of total dissolved solids.
- Post-filter: After the tank, there is usually an inline final carbon filter to polish the taste before the water reaches the faucet.
- Storage tank: This is the large tank that stores the filtered water. It is often on the far left or right of the system.
- Automatic shut-off valve: This is located on the line going to the storage tank. It shuts off water production when the tank is full.
- Flow restrictor: A small, often red, device on the waste water line that helps regulate pressure.
- Check valve: Prevents water from flowing backward from the tank to the membrane. Usually located after the membrane housing.
Take a moment to identify each part on your system. Snap a photo on your phone for reference if needed. Familiarizing yourself with the components will give you more confidence as you complete the filter changes. Proper maintenance is key to enjoying clean, healthy RO water for years to come.
Step-by-Step Instructions for Changing Filter Cartridges
Now that you have all your tools and replacement filters ready, it’s time to get started. Follow these steps to change out the filter cartridges in your reverse osmosis system:
- Turn off the water supply: Locate the valve on the feed water line to your RO system and turn it clockwise to shut off the water supply. This is usually a simple knob or lever.
- Depressurize the system: Open the RO faucet to release pressure and let any remaining water drain out. Leave the faucet open until you’re done changing filters.
- Remove filter housings: Unscrew the filter housings that hold the pre-filters and post-filter using the filter wrench if needed. Have a bucket ready to catch any water that spills out. If your system has a membrane housing, leave that in place for now.
- Take out old filters: Remove the old sediment and carbon block filters from the housings and discard them. Note the direction they are facing so you install the new ones correctly.
- Clean filter housings: Wash out the empty housings with mild dish soap and rinse thoroughly. Check O-rings for wear and lubricate with silicone grease.
- Insert new filters: Put the new sediment filter in the first housing and the new carbon block filters in the second and third housings. Make sure they are facing the right direction. Avoid touching the filter material with your hands.
- Reattach filter housings: Screw the housings with the new filters back onto the RO unit. Tighten firmly by hand, but do not overtighten or you may damage the O-rings.
- Replace post filter: Locate the inline post filter (often a 10″ carbon filter). Remove it from the holding clips. Note which way the water flows through it, then detach the tubing on both ends using the quick-connect fittings. Attach the new post filter in the same direction and clip it in place.
- Flush new filters: Turn the feed water valve back on and let water run through the RO faucet for 5-10 minutes. This flushes out any carbon fines or air bubbles from the new filters. Check for leaks.
- Sanitize if needed: If you choose to sanitize the system while you have it apart, follow the manufacturer’s instructions using food-grade hydrogen peroxide or sanitizing solution.
By carefully following these steps, you can properly replace the sediment, carbon block, and post filters to keep your reverse osmosis system making great-tasting purified water. The process is straightforward but take your time to avoid mistakes or leaks.
Change Filter Cartridges in Modular Systems
Many reverse osmosis systems such as the Home Master TMAFC have a modular filter design, which makes it very easy to remove and replace filters. There is very little effort involved at all!
Tips and Troubleshooting
Even with regular maintenance and filter replacements, you may occasionally encounter issues with your reverse osmosis system. Here are some tips and common problems to watch out for:
- Leaks: If you notice water leaking from the filter housings, the most likely cause is a misaligned or damaged O-ring. Shut off the water supply, depressurize the system, and check that the O-rings are seated properly and not pinched or torn. Replace if needed.
- Low water pressure: Clogged pre-filters are a common reason for reduced water flow. Replace the sediment and carbon filters according to the maintenance schedule. If the pressure is still low with new filters, you may need to replace the RO membrane as well.
- Bad taste or odor: If your water develops an off taste or smell, it’s usually a sign that the carbon post-filter needs replacing. It could also indicate that the RO membrane is failing and allowing contaminants through. Sanitize the system and replace all filters.
- Noisy faucet: Some noise when the RO system is running is normal, but excessive gurgling or dripping sounds can be caused by a faulty air gap faucet or drain saddle. Check for clogs and proper installation.
- High TDS: If you notice the TDS (total dissolved solids) level increasing in your RO water, the membrane may be fouled or damaged. Make sure the pre-filters are changed on schedule to protect the membrane. Replace the RO membrane if needed.
- Cloudy water: Tiny air bubbles can make the water appear cloudy right after changing filters. This is harmless and should clear up within a day. If it persists, you may need to bleed air out of the tank by opening the faucet.
Remember, many problems can be avoided by following the manufacturer’s recommended maintenance schedule and replacing filters on time. If you’re unsure about any issues with your RO system, don’t hesitate to contact a professional for assistance.
Maintenance Schedule and Record-Keeping
To ensure your reverse osmosis system continues to provide high-quality water, it’s important to follow a regular maintenance schedule and keep records of filter changes and other services. Here’s what you should include:
- Pre-filters (sediment and carbon): Replace every 6-12 months, depending on water quality and usage. Write down the date of each filter change.
- RO membrane: Replace every 2-3 years for city water or every 2 years for well water. Note the replacement date and any changes in water production or quality leading up to it.
- Post filter: Replace the carbon post filter every 1-2 years, or at the same time as the RO membrane. Log the replacement date.
- Annual sanitization: Once a year, sanitize the entire system, including the storage tank, by flushing with a hydrogen peroxide solution or other approved sanitizer. Record the date and sanitizing solution used.
- Water quality tests: Periodically test your water with a TDS meter to verify membrane performance. Log the results and compare to previous readings to spot any trends.
- Tank pressure: Check the air pressure in the storage tank yearly. Add air if needed to maintain 7-8 psi. Note the date and psi.
- Leaks and repairs: Write down any leaks, odd noises, or other issues you notice and the steps taken to fix them. This can help identify recurring problems.
Keep your maintenance records and owner’s manual together in a convenient location near the RO system for easy reference. You can use a simple notebook or spreadsheet to log dates and notes.
Following a consistent maintenance schedule not only extends the life of your RO components, it also gives you peace of mind that your drinking water is clean and safe. Plus, regular upkeep can save you money by preventing costly repairs or early membrane failure down the road.
Set reminders on your phone or calendar so you don’t forget to check on your system and replace filters on time. With proper care and attention, your reverse osmosis unit will provide many years of dependable service.
How to Replace the Reverse Osmosis Membrane
The reverse osmosis (RO) membrane is the heart of your RO system. It’s responsible for removing the tiniest contaminants, including dissolved solids, heavy metals, and microorganisms. While the membrane typically lasts 2-3 years, it will eventually need replacement to maintain optimal water quality. Here’s how to do it:
- Gather tools and parts: You’ll need a new RO membrane, pliers, a bucket, and a towel. Make sure you have the correct membrane for your system.
- Shut off water and depressurize: Close the valve on the feed water line to your RO system. Open the RO faucet to release pressure and let the tank drain completely.
- Locate the membrane housing: The RO membrane is usually located in the horizontal housing in the center of the system. Disconnect the tubing from the housing cap using the quick-connect fittings.1
- Remove the old membrane: Unscrew the cap from the membrane housing. Using needle-nose pliers, grab the membrane by the plastic end and pull it straight out. Discard the old membrane.
- Insert the new membrane: Remove the new membrane from its packaging. Avoid touching the membrane material. Note the direction of the brine seal (double O-rings) and insert that end into the housing first. Push the membrane all the way in until it stops.1
- Reconnect and flush: Screw the end cap back on the housing and reconnect the tubing. Open the feed water valve and let the system run for 5-10 minutes to flush out preservative from the new membrane. Check for leaks.1
- Discard initial water: RO water may have a slightly salty taste until the new membrane is flushed completely. Discard the first few tanks of water or until the taste returns to normal.
By following these steps, you can replace the RO membrane and restore the effectiveness of your reverse osmosis system. Regular membrane replacement, along with changing the pre- and post-filters, will ensure you and your family enjoy clean, high-quality water for all your needs.
Conclusion
In conclusion, regularly replacing the filters and membrane in your reverse osmosis system is crucial for maintaining optimal performance and ensuring you have access to clean, high-quality drinking water. By following the step-by-step instructions outlined in this guide, you can confidently tackle this important maintenance task yourself.


We tried replacing the filters for my Reverse Osmosis system. When unscrewing one of the units, tons of water came gushing out. What a mess! All the components for the water were turned off.
Why on earth did this happen. Seems that large amounts of water was still in the filers??? Is this possible. We had large amounts of water all over my floors and cabinets.
HELP!!!!
Yes, the filters remain filled with water. When removing them you have to be careful not to spill the water in them.
The filters is still full of water. You must put a bucket underneath it for spillage