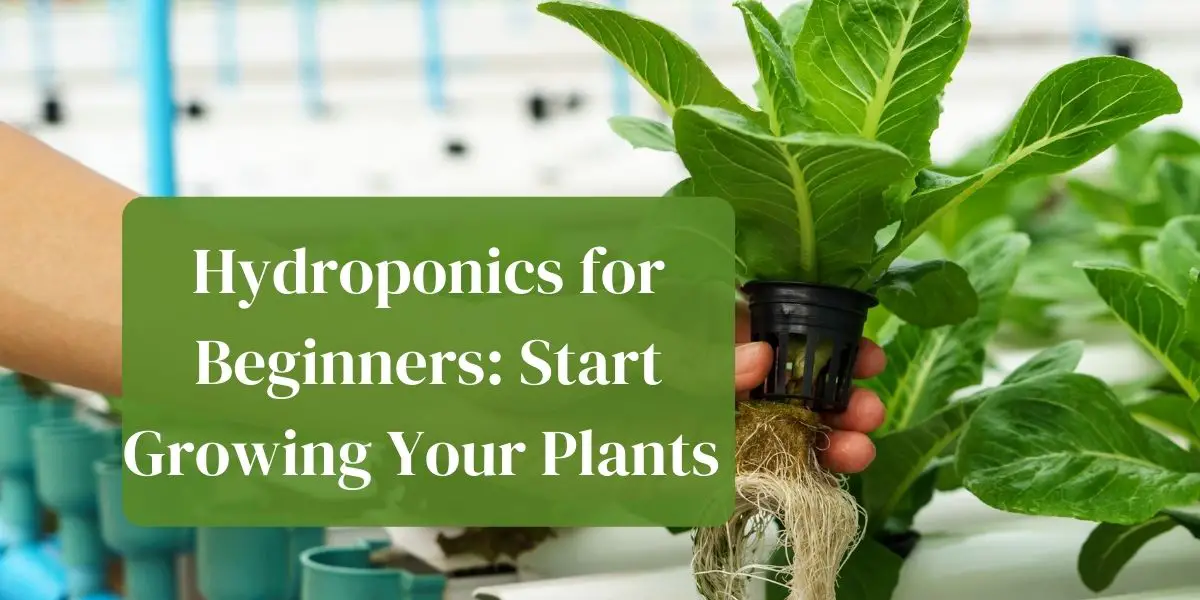
So you’re researching hydroponics for beginners. Awesome! Welcome to the wonderful world of hydroponics and growing the most amazing vegetables (and even fruits) that you’ve ever tasted 🙂
Note: In case you’re wondering what hydroponics has to do with RO Systems, it’s that RO or distilled water is ideal to use with hydroponic systems. This way you can have exact control over the kind of water you’ll use for your plants.
Some buying guides to help you:
- Check out the best RO systems for growing here
- Best reverse osmosis systems overall
- Best countertop reverse osmosis systems

Image credit: Vecteezy
Table of Contents
- Chapter 1: What is hydroponics and how does it work?
- Chapter 2: What can you grow with hydroponics?
- Chapter 3: Hydroponics vs Soil Vegetables
- Chapter 4: Components of a hydroponic system
- Chapter 5: Cheap hydroponics systems for home
- Chapter 6: Indoor Hydroponic Systems
- Chapter 7: Lessons from my first hydroponic grow
Chapter 1: What is hydroponics and how does it work?
Hydroponics is a way of growing plants without soil, directly in a mixture of water and nutrients through a growing medium like expanded clay.
The idea behind hydroponics is that it’s versatile, meaning that hydroponic plants can be grown pretty much anywhere, and the lack of soil means there are far fewer pests, diseases, or the need for pesticides and other chemicals.
Hydroponics would also have much promise for growing plants in outer space where you don’t have access to soil.
You can set up a hydroponic growing system outdoors, indoors, or even in your basement.
Additionally, you can grow a lot more plants in a lot less space, and even more so if you set up a vertical system.
Hydroponics is very efficient, since all the water and nutrients are exclusively available – and easily accessible – to the plants. Plants tend to grow faster, too.
The process is quite similar to growing regular plants:
- Germinate the seed in some coir or rockwool
- Once the plant has sprouted some leaves and is ready, transplant it into your growing medium.
Chapter 2: What can you grow with hydroponics?
Hypothetically, anything.
Practically, smaller plants like greens, flowers, small vegetables, small shrubs and herbs are the best bet because of the space constraints.
Larger plants will naturally grow very big and to manage such giant root systems and provide enough water would be quite a hassle.
Small plants that have quick turnover like lettuce, kale, spinach, and herbs are the easiest plants to grow hydroponically and you’ll have quick success with them.
Flowering plants and fruit bearing plants are more difficult, so it would be best to try those once you are a bit more comfortable and experienced.
What does a plant need to grow?
To successfully build a working hydroponics system, you need to understand what a plant needs to flourish and how you?re going to provide it.
Plants need the following things:
- Light, which can come from the sun or a proper artificial light source
- Water
- Nutrients(which normal plants pull from the soil)
- Carbon dioxide(used with light for photosynthesis)
- Oxygen for respiration
- Some form of support
As you can see, soil is not necessary for growing – soil is necessary in the sense that it is a medium from which the plant gets its essential nutrients.
Chapter 3: Hydroponics vs Soil Vegetables
The number one question you’re probably asking yourself as you’re researching hydroponics for beginners is wondering which are better: hydroponic or soil vegetables?
If you’re unfamiliar with hydroponics, then this is certainly a valid and crucial question – you’re taking a plant, removing it from what one would consider most important for it, and expecting it to grow.
Before we dive into answering the question, it’s important to clarify what you mean when you ask “which are better?”
Better in terms of flavor?
Better in terms of growth and yield?
Better in terms of nutrition?
Since you probably came over to this page looking for answers on either of those questions, I’m going to try my best to answer each one. Feel free to skip down to the section related to your question – or keep reading, more information is always better 🙂
In terms of flavor
It’s difficult to say whether hydroponic vegetables taste better or worse than soil-grown vegetables. Rather than the growing medium, the variety and seed you use plays a greater role in determining taste.
However, if soil conditions are generally poor(pollution, low nutrient count, other metallic trace minerals), then soil-based plants would probably suffer compared to hydroponic plants.
I’ve seen this firsthand with growing leafy greens hydroponically at home in India. Soil conditions are not the best here, so my hydroponic greens did indeed taste a lot better to me than their soil-grown counterparts.
This is probably due to the fact that you’re eliminating all the potential contaminants from the growing medium and leaving just water and the plant’s essential nutrients.
Interestingly enough, there have been studies where, in a blind taste test, hydroponic tomatoes were reported to have tasted better than soil-grown tomatoes.
However, outside of a controlled study such as that, the major factor is the quality of seed you use and the purity of the surroundings more than anything else.
For root vegetables that are always in the soil until harvest, they’ll obviously have an earthy taste that you won’t be able to find in hydroponically grown root veggies(it’s possible to grow root veggies hydroponically, too!).
You can also adjust the nutrient mixture to produce varying flavors.
In terms of nutritional value
This is a toughie.
It’s not very easy to proclaim whether or not soil grown veggies are more or less nutritious than hydroponically grown vegetables.
The biggest influencing factor on how nutritious vegetables are is freshness.
The longer it takes for the vegetable to reach your plate(and hopefully mouth) from when it was grown, the less nutritional value it has.
Plants make their own vitamins, so you’re covered there. It’s the mineral content that will vary.
However, since we’re on the subject, technically speaking, you can make hydroponic veggies more nutrient-dense by increasing the concentration of the nutrient solution and adding trace minerals. How much it will actually increase again has too many variables.
The bottom line is, though, instead of worrying about how much nutritional value a single vegetable has, you should just try to eat a lot more of them to extract the most nutrition possible.
When it comes to vegetables, more is better 🙂
In terms of growth and yield
Unlike flavor, in growth and yield, there is a surprising and stark difference between soil grown and hydroponically grown vegetables.
When a plant is growing in soil, it has to use up a lot of energy to actively seek out nutrients and water. A lot of the plant’s energy sources – limited as they are – end up going towards seeking out rather than growing.
Not only that, but plants have to contend with a lot of issues in soil. Fungi, insects, and weeds are all out there to eat the plant and compete for its resources. There are hundreds of other variables that can affect a plant’s growth.
In hydroponic systems, the plant’s requirements are quite literally served up on a silver platter, so there is little to no energy required for seeking out. Nutrients and water are available all around the roots, and everywhere.
As a result, hydroponic plants have been observed to grow faster and bigger than soil-grown plants.
However, the size of a plant is still limited by its genetic makeup. You can’t plant a cherry tomato in hydroponics and expect to get a full size tomato out of it.
But by providing all the nutrients the plant needs, as well as adequate lighting and water, you can ensure that your cherry tomatoes are the best cherry tomatoes possible.
Dr. Howard Resh, a pioneer of hydroponics, discusses the topic in depth in his book, Hydroponic Food Production: A Definitive Guidebook for the Advanced Home Gardener and the Commercial Hydroponic Grower (currently in it’s 7th edition).
Hydroponic growing is advantageous because you can grow plants that could not have otherwise grown in your location.
For example, you could be living in a desert, but as long as you have access to water, you can grow all the plants you wanted. This is probably the most striking benefit of hydroponic vegetables. Imagine deserts and countries without arable land no longer having to rely on importing their vegetables – instead growing them hydroponically themselves!
In the book, Howard Resh compares soil yields vs hydroponic yields. The results are remarkable. Here is a small sample of what he compared:
Soil:
Peas => 1 ton
Lettuce => 9000 lbs
Tomatoes => 5 – 10 tons
Hydroponics:
Peas => 9 tons
Lettuce => 21000 lbs
Tomatoes => 60 – 300 tons
As you can see, hydroponics clearly produced a LOT more yields than soil did.
So what other factors influence greater yields in hydroponics vs soil?
Year round gardening
Since you can grow hydroponic plants indoors, there’s no limitation in terms of the season, amount of sunlight, or temperature. While soil plants can only be grown when the soil is at the correct temperature and there are enough daylight hours, indoors, you can mimic whatever conditions you want using temperature control and grow lights.
You can grow warm weather plants in the winter, or cool weather plants in the summer, as long as you can control the temperature.
Not only that, but if you’re growing plants that have a fast turnaround – such as leafy greens, which can be ready in hydroponic systems in as little as 45 days, you can do up to 8 and a half 45 day cycles for year round growing – regardless of the season.
Less space required
Since hydroponic plants don’t necessarily need to compete for or seek out nutrients(you’re providing each plant whatever they need), you can grow them a lot closer together than you could in soil.
Not only can you space them closer together, but you can also grow hydroponic plants vertically using a tower system. In this manner, you can grow plants both vertically and horizontally, all spaced closely together to produce a huge yield.
Certain crops are more suited to hydroponics
Some crops thrive in hydroponic conditions – such as leafy greens, tomatoes, cucumbers, and peppers. Other plants are tougher to grow without soil, such as watermelons(though it is hypothetically possible).
Lettuce, spinach, kale, and bok choy(my personal favorites to grow) have really quick turnarounds and grow very fast. In my first grow ever, I was able to harvest bok choy from 4 plants 3 times during a 10 day period before finally cutting off all the leaves and removing the roots from the system.
Lighting
If you’re growing indoors, you won’t be depending on sunlight for growing your plants. Instead, you’ll be using grow lights to mimic the hours of daylight.
Plants generally require blue spectrum light for vegetative growth and red spectrum light for flowering. Natural sunlight contains all the spectra, and you can buy commercial grow lights which have both red and blue LEDs. Alternatively, you can use white T5 fluorescent tubes or CFL bulbs which do a good job of providing the blue spectrum and a bit of the red spectrum.
You need to be mindful though of making sure the lights are very close to the plants – too far away and the light becomes too weak(it’s artificial, after all).
Fertilizer
Soil based plants have to really work hard to get the nutrients they need. Natural soil may or may not contain enough levels of nutrients, so if your plants don’t get the correct nutrients at the correct time, they may not grow as well.
However, in a hydroponic system, the amount of nutrients and when your plants will receive them are in your control and by providing it at the ideal time and in the ideal quantity, you can accelerate your plant’s growth.
Chapter 4: Components of a hydroponic system
So you want to set up your first hydroponic system. What are the things you’ll need? What makes up a hydroponic system?
Reservoir
A reservoir is what holds the supply of water and nutrients that your plant will require over the course of its growth. They can be of any size and shape, but should be able to hold a decent capacity of water so you don’t need to keep refilling it.

Nutrients
Since you’re growing plants without soil, you’ll have to provide them with the nutrients directly. In your reservoir, you’ll add some nutrient solution to the water.
In reality, you won’t need too much nutrient solution – just a tablespoon or less for every gallon of water is the general amount recommended by most manufacturers – but specifics will vary so remember to read the instructions on your nutrient solution label.
Also bear in mind that Miracle Gro and other soil fertilizers won’t cut it, since they’re not?complete nutrient profiles. You’ll need special hydroponic fertilizers, which are actually not uncommon and can be found on Amazon or at any gardening store.
For growing leafy greens, you’ll want “grow” nutrients.
If you’re growing flowering plants(not recommended for first time grows), you’ll first need “grow” nutrients to get the plant to spread a bit and get bigger, then “bloom” nutrients mixed with a tiny bit of “grow” to encourage the plant to flower.
A unit to grow the plants in
With your reservoir and nutrient solution in place, you’ll need somewhere to put your plants!
In some hydroponic systems, the plants are placed directly in the reservoirs, whereas in others, the plants are placed in a large pipe or box which is connected to the reservoir.
A means of oxygenation
Plant roots require oxygen to survive, and if they’re going to be submerged in water at all times, they’re going to suffocate and die.
In soil, there is plenty of oxygen, and the roots are not always surrounded by water. This is how plants can naturally “breathe”.
Since we’re growing in water, to counter this, you need to provide your plant roots with oxygen either through an air stone via an air pump or by periodically removing the water from below your plants to let the roots breathe.
Another method called the Kratky method relies on the fact that plants will use up water as they grow, so the water level in the reservoir will naturally drop and the gap will be filled with air automatically, allowing the bottom parts of the roots to soak up water and nutrients, and the top parts of the roots to breathe.
Grow media and net cups
Finally, let’s get to the plants! You’ll need some sort of grow media since you’re not using soil.
A common grow media used by many hydroponic growers is hydroton, or expanded clay.

These are super lightweight pieces of expanded clay that look at lot like pebbles. They provide great support for the plant inside the net cup.
The net cup is what you’ll place the plant and grow media in. The net cup will then go into your hydroponic system, whichever one you choose to use.
Net cups are quite cheap. As the name suggests, they are cups with a netted body to give room for roots to grow out of.
Something to germinate your plants in
An easy way of starting hydroponics is to use an already-grown seedling and transplant it from soil into a hydroponic system.
If you wish to grow your plants from seed, you’ll need some media to start your seeds in.
There are a lot of options: most people use rockwool(which is rock powder spun into a wooly substance – think rock cotton candy), coir bundles(powdered woody plant material), or you could even use cotton balls.
You just need something soft enough for roots and a seedling to penetrate through, and porous enough to hold water for the young plant to grow.
Lighting
Last but not least, you’ll need light. Plants simply cannot grow properly without light. The best kind of light your plants can get is obviously sunlight, but even if you don’t have a sunny window or porch, you can use artificial light from grow lights to do the job.
Plants will still grow well under artificial light, but the light source needs to be much closer to the plant than you’d think – your ceiling lights won’t do the trick.
For indoor lighting, use T5 tubelights, LED bulbs/tubes, CFL bulbs, or even high-pressure sodium lights.
More information on lighting will come further down in the chapter on indoor hydroponics.
Chapter 5: Cheap hydroponics systems for home
Which hydroponic system is the most cost effective?
The most cost-effective system for hydroponics, hands down, is the Kratky method. The Kratky system is named after the professor from the University of Hawaii who pioneered it, A. B. Kratky.
The Kratky method is incredibly simple because you don’t need any special equipment or pumps. You just need a sufficient amount of water and nutrient solution, and it’s set and forget.
The Kratky method works by providing the plant all the water and nutrients it will need from the beginning of its life to harvest in the first go.
At first, the water level will be high and the bottom of your holder will be submerged in it. As the plant roots grow and the plant uses up the water, the water level drops, and the roots keep extending downwards into the lowering water level.
The advantage of this is that the oxygen that you?d otherwise need to bubble into the water using an air pump gets there because of the increasing gap between the plant and the water level.
The atmosphere is automatically refilling the oxygen for you!
You?d need a roughly one gallon bucket to grow a single lettuce plant.
Of course, this is for growing on a small scale. If you wish to grow a lot more things, then you’ll need a lot more space for growing using the Kratky method. For 20 plants, you would need 20 buckets, or at the very least, 20 gallons of storage space and enough surface area on your container to fit 20 plants.
20 gallons is still manageable, but what about 100 plants? If you?re planning to grow on a commercial scale, you?d need a bigger and more complex system, especially if you?re tight on space.
Since we are growing hydroponically, it’s no big deal if the plants are crowded a little – there are more than enough nutrients and more than enough water to go around.
How to get a Kratky system going
Setting up a Kratky grow is incredibly easy.
Step 1: Germinate your seeds
First things first, you’ll have to germinate your seeds. You can germinate in rockwool cubes, coir bundles, or even thick cotton swabs. Anything soft and porous that your plant roots can penetrate into will work.
To germinate, thoroughly wet your growing medium – e.g. the rockwool.
Then poke a tiny hole in the top and drop some seeds into the hole. It’s a good idea to drop multiple seeds in a single cube to ?guarantee? that at least one will germinate.
Keep the seeds in a humid place and make sure the medium does not dry out. It does not need to be soaking wet – indeed, it shouldn?t – but it should be damp at all times and not dry out.
Until the first shoots pop out, you don’t need light either, so you can store them in a closet or something too. To lock the humidity in, put a plastic cover on top of the rockwool cubes.
In one to three days, you’ll see shoots come out. Once the shoots are out, make sure they have very good exposure to light. You can use grow lights like an LED bulb or a T5 tube light, or if you have a sunny window, the windowsill will do fine, too.
South-facing windows will generally receive consistent sunlight in the Northern hemisphere, especially during winter months.
It will take about 10-14 days for the germinated seed to develop its first set of true leaves(proper leaves with visible veins).
While you?re waiting for the seeds to germinate, it’s time to set up your growing bucket.
Step 2: Set up your growing bucket
Since we?re building a cheap setup, you can really use any bucket you can find. Use a bucket you have lying around, or go pick one up from Walmart or Target.
You can even use a large shoebox or plastic container, as long as the vessel you choose has a removable lid.
Ideally, you want at least one gallon of capacity for one head of lettuce, but if you can’t find something big enough, use something smaller and bear in mind you will have to refill it once the water level drops too low.
Next, cut a hole in the lid a little smaller than the widest part of your net cup. This will ensure that the net cup won’t fall in all the way.
The best way to do this is to use a box cutter or knife and cut a smaller circle than you need, then start lightly trimming away to get the right size.
If you?re going to grow your plant outside, you want to try to have as little sunlight penetrate the inside of the bucket as possible. This is to inhibit the growth of algae and other bacteria.
So if your bucket or vessel is transparent or clear, cover it with some dark paper or give it a coat of dark spray paint.
If you?re growing inside on a windowsill or using lights, you won’t have this issue.
With your lid and bucket ready, it’s time to transplant the seeds once they’ve germinated and sprouted leaves.
Step 3: Transplanting your shoots into the growing mixture
Once your seedlings have two to three true leaves, they’re ready to be transplanted.
When the seedling first sprouts, it will form two or three leaf-like structures – these aren?t leaves, but the nutrient stores the plant will use in the early days of its life.
True leaves are unmistakable – they have proper, visible veins.
Take a net cup, and drop some growing media such as hydroton in the bottom of the cup. One layer is more than enough. Pick up your seedling still inside the rockwool or coir you planted it in and place it in the net cup on the hydroton.
Get some more hydroton and fill up the gaps between the rockwool and the net cup, and drop some more hydroton in until the rockwool is about covered – but make sure your leaves are still out!
Be careful when dropping the hydroton in as the plants are still extremely fragile and you don’t want to break them.
Fill up your bucket with water up to a level where the last ? of an inch to 1 inch of the net cup would be submerged in the water after it’s placed in the hole.
Make a note of how much water you?ve poured, since you’ll need that to calculate the amount of nutrient solution to put in.
This will vary from manufacturer to to manufacturer so it’s best to read the instructions and see the correct proportions.
If you want to be extra cautious, use a pH meter to make sure the water is slightly acidic – around 6.0 is an ideal range for lettuce, spinach, and greens.
WIth your bucket containing the solution and your plant in the netcup, it’s time to combine the two. Place the net cup inside the hole you cut out.
Your Kratky setup is now complete. Periodically keep checking the water level to make sure it doesn’t drop too far down.
Step 4: Being patient
Plants need some time to grow!
Depending on the nature of the plant, that can be anywhere between a few weeks to a few months to a few years.
If you?re growing simple, small greens and herbs, you can start reaping the benefits almost immediately within 5 weeks after transplanting or so.
For larger, fruit-bearing plants, it will be a little longer.
While you?re waiting for your plant to mature, just be patient, keep an eye on it, and make sure it’s getting enough light and that the nutrient solution does not run out.
Aside from that, at the end of 4-5 weeks, you’ll have a nice, fresh head of lettuce or bunch of spinach that you can harvest and enjoy.
Light setup options
If you don’t have access to a very sunny area in your house or on your porch, you’ll need to grow your plants indoors – especially if it’s very cold outside such as in the winter.
That’s the beauty of hydroponics – you can effectively grow all year round as long as you have the temperature and lighting under control.
For artificial lighting, there are LOTS of options.
The cheapest lights that you can get would be T5 fluorescent lights, CFL bulbs, or LED bulbs. LEDs will be the most cost effective in the long run, but the bulbs are more expensive to buy.
All you need is a holder for the bulbs and some way to adjust the height of the holder.
Ideally, you’ll want to keep the light very close to the plants – about one or two inches above the plant is just right, since artificial lights are nowhere as powerful as natural sunlight.
If you don’t get the lighting correct, the plants will grow long and spindly as they stretch themselves towards the light to get all that they can to photosynthesize and grow properly.
I think the best two options are:
- Use a holder to fit 3-4 T5 tubelights and hang them from a chain
- Use a holder that will reflect most of the LED bulbs light downwards and hang that from a chain
You?ll need some mechanism to adjust the height as your plants grow bigger and bigger, and a simple chain on an S bolt works perfectly.
You can hang the fixture from the bottom of a cabinet, or use some PVC pipes to make a little holder.
What I do is use a little timer socket plugged into the outlet, and the light fixture plugs into the timer. I set my timer for about 16 hours of light per day, so the timer will automatically switch the lights on and off without me having to worry about it.
Once you have a good lighting setup, you can use it for both germinating seeds and for actually growing, too.
There are of course fully featured LED grow lights available too, but those are naturally going to be rather expensive and that would be out of the scope of this post.
Other ways you can save on costs
The setup discussed so far still does require some accessories like net cups and hydroton. You could technically do away with both using a pool noodle instead, which you can find at a dollar store and cut up into multiple sections.
You cut the pool noodle into cross sections, then snip off a little slice of the cross section and use it to stuff the center hole.
Then compress the sides from where you cut, and you have a growing media!
If you choose to use this method, you’ll need to make your holes just big enough so you have to slightly squeeze your pool noodle cut outs and hold them in place with friction.
You?d grow your seedlings in a separate area, and just after they sprout, gently pull them out and place them in the pool noodle, with the roots just touching the water(no nutrient solution yet). As the roots and plant grows, slightly reduce the water level and add nutrient solution, and you?re good to go.
What can you grow in the Kratky system?
Even though the paper was published specifically with a study of varieties of lettuce, you can grow conceivably anything in the Kratky system.
I am guessing the professor chose lettuce for his study because leafy greens are the easiest things to grow.
For truly set and forget plants, I would still stick to greens you don’t need to flower such as:
- Lettuces
- Spinach
- Bok choy
- Kale
- Mint
- Coriander
- Basil
- Other herbs
The reason these are set and forget is that you just need a big enough container to house enough water to last the plant through its useful life.
Throughout the course of its growth the plant will take up all the water and nutrients it needs and by the end of it you can harvest the plant, throw out any remaining solution, wash up and start again.
For flowering plants(i.e. plants that produce fruits such as tomatoes, cucumbers, strawberries, etc), things get a little more complicated.
If you’re growing indoors, you’ll need to trigger flowering by:
- varying the light type
- changing the nutrient solution
There are different kinds of nutrient solutions available. Some will be general grow, where the nutrients are those required by the plants to produce leaves and grow.
Other solutions will contain higher concentrations of nutrients required by plants for flowering and blooming. These nutrients are often called “bloom”.
So once your plant has reached a desirable size, and you want it to start flowering and producing fruit, you’ll need to change out the nutrient solution to have a higher proportion of bloom than grow nutrients.
In this manner, it’s not a truly “set and forget” idea – there is going to be a bit of maintenance involved.
Call it modified Kratky.
Also, consider that fruiting plants are generally larger than leafy greens, so again, you’ll need a larger container for changing out the water less often.
Aside from this limitation, I’ve seen people grow just about anything using Kratky.
Indoors or outdoors?
Another question raised is can you use the Kratky system indoors or does it have to be outdoors?
The answer as far as I am aware is that it can work both ways.
In fact, if the temperature and weather conditions are favorable to the plant, you’ll almost always get better results outdoors than indoors simply because there is a much stronger light source: the sun.
Indoors, you’ll have to provide your own form of sufficient lighting. It’s not hard to do, but if you can harness the sun, why choose artificial light?
One argument in favor of growing indoors is your plants will not be susceptible to pests.
Outdoors, insects, birds, and other animals will come to eat your plants. Indoors, not so much. Things will be much more in control.
You can control the pest problem by growing inside a net covering or greenhouse on your porch or backyard. This way there will still be plenty of sunlight but less direct access to animals.
One argument in favor of growing outdoors – especially if you’re growing fruiting plants – is that nature will pollinate your plants for you. Indoors, you’ll need to pollinate yourself.
However, as far as the Kratky system itself is concerned, indoors or outdoors, both will not be an issue as long as the temperature and light is sufficient.
Chapter 6: Indoor Hydroponic Systems
Hydroponics is an amazing way of growing plants. It’s clean, eco friendly, and best of all, it can be done anywhere – even indoors.
So in this post, we’ll be talking about indoor hydroponic growing systems.
Hydroponics takes advantage of the fact that there are just a few necessities for a plant, and if we can provide those necessities in a controller manner, we?re good to go!
I would say hydroponics is both an art and a science – there is of course the science of plant growth, but there?s also the art of how you set it up in your home.
The beauty of such a flexible system is that there are so many ways you can grow!
Why set up an indoor hydroponic system
1)You live in an apartment and want some plants
If you live in an apartment chances are you don’t have any outside space for planting possibly besides a little terrace or a fire escape.
Hydroponics enables you to grow your own food – or anything really – in a minimal amount of space. You could even do it on a bookshelf, provided you are able to set up sufficient lighting.
Since we?re directly providing the nutrients the plant needs through the water, you can grow plants much closer together than you would have in soil.
2) You want to be able to grow your own food no matter what external conditions such as weather are
The next advantage of hydroponics is being able to grow regardless of outside temperature. While you could achieve this with a greenhouse, too, setting up a small growing station indoors ensures a controlled environment for growing your plants in.
Provided your place is sufficiently warm for the plants you?re trying to grow, you can have a bountiful crop throughout even the harshest winter.
3) You don’t want to deal with pests
Hydroponics systems, since they’re not being grown in soil, have far fewer pests that traditional soil-based growing.
Since many pests that attack crops live in the soil, by doing away with the soil altogether, you greatly reduce the pest issue.
4) You want some fresh air
If you live in a crowded city, chances are you are not getting enough fresh air. It’s amazing what just a few plants can do to freshen up air circulation by absorbing carbon dioxide and providing you with fresh oxygen.
5) You like to look at greenery!
Finally, the best way to decorate your home is with plants! The original form of ?natural beauty?, plants can liven up any living space and make a house or apartment feel more homely.
Where to set up your indoor hydroponic system
The big question of growing indoors is where you can set up your hydroponic system. Plants require light, and lots of it. The best place to set up a plant system indoors is where
- The plant can get enough natural light
- You can provide enough artificial light
If you have a nice sunny window, you can place your plants at the window and that should get them enough light.
Ideally, a south facing window anywhere in the northern hemisphere will get the most direct sunlight.
Alternatively, if you have a corner that has two windows on either side, then it’s even better. Remember: the more sunlight you can give the plant, the better.
If you don’t have any south facing windows(or north facing if you?re in the southern hemisphere) and you?re concerned you won’t be able to get enough light, then you can place the plant on a window and supplement the sunlight with a grow light.
If you don’t have any suitable windows at all(if they’re frosted/tinted/blocked by another building), then your best bet is to choose a location where you can grow and hang lights over the plants. Bookshelves work great because you have a surface to put the plants on and you have a surface to attach lights to.
One final factor to consider is temperature. Some plants prefer cooler temperatures than others, and in some areas where the weather is consistently hot, a basement is an ideal location to set up a growing station because basements are usually a few degrees cooler than the rest of the house.
Which type of system should you use indoors?
If I?m growing indoors, that means I?m probably going to be short on space and would prefer to make as little of a mess as possible.
There are two good options for indoor growing:
- A Kratky setup
- A vertical ebb and flow setup
- If you have a bit of wide space, a raft system
At their core, all hydroponic systems are the same: there is a means to hold the plants, a means to provide oxygen to the plants, and a means to provide water and nutrients.
Kratky setup
We’ve already discussed Kratky setups in great detail above.
Ebb and flow setup
Another really neat method you can use – especially for indoor gardens and vertical farming is an ebb and flow setup.
An ebb and flow setup uses a pump to circulate water through your plants. A pump floods the entire system for a short time, and gravity drains the entire area.
This cycle repeats itself 2-3 times during the day using a timer.

Example of ebb and flow system. Image credit Vecteezy
The only disadvantage of the ebb and flow setup is your dependance on electricity. However, if you?re using grow lights, you?re depending on electricity anyhow.
Ebb and flow systems are really cheap to set up, even though they may look complicated at first.
All there is to it is:
- A reservoir that houses a mix of water and nutrients
- A pump for pushing the water from the reservoir into the plants
- An overflow pipe that ensures water does not rise beyond a certain level
- A tray or tower containing your plants
You can use a tray or a tower – whichever you prefer.
For plants that are not too fond of extremely wet conditions, the ebb and flow system would be an advantage over the Kratky system where the roots are constantly touching water.
Honestly, though, for indoor purposes, use an ebb and flow system for a tower rather than anything else. If you have the horizontal space, stick to something simpler like a Kratky system.
A single 4 foot tower can easily house 12 to 15 small plants – that’s in a footprint of less than 2 square feet.
Setting up Ebb and flow mechanism
- Get a large container to house your nutrients and water
- Get a pump capable of pushing water to your desired height – pumps capable of 1.5 meters are fairly cheap and should be more than enough for a simple tower
- Use one pipe from the pump to the top of your tower, where water will collect and begin draining down through the inside of the tower, watering your plants on the way down
- If you?re using a horizontal planting system, you’ll need a second pipe which acts as an overflow valve.
- Stick this pipe inside your planting area up to the maximum height you wish the water level to rise to: around 1-2 inches from the top of the net cups
- The second end of this pipe goes back into your reservoir
- Fill your reservoir with nutrients and water(proportions according to water capacity, usually found on the nutrient solution labels)
- Set a timer to run the pump for as long as it takes to flood water to the top of your overflow valve – run it manually once to see
- Set the timer on repeat for 2 to 3 cycles a day
- Place your germinated plants in your net pots into the system and turn on the timer
Kratky vs tower
For casual indoor growing, a Kratky system works great because you’ll be able to dabble in hydroponics for next to no cost.
If you have lots of room like a spare room or an empty basement, then Kratky works well, too, because you can easily place multiple large containers without any problems.
For more serious growing, or for growing vertically in a tight space, you’ll need to set up a tower with an ebb and flow mechanism.
Providing lighting for a Kratky system will definitely be easier since you just require a horizontal row of lights.
For a tower, lighting will be harder since you’ll need to add a structure to house multiple bulbs aimed at various heights in your tower.
Just one large light at the top will not suffice here because the lower level plants will be deprived of light and grow long and leggy instead of nice and strong.
Other systems to look into
Raft system
My first setup indoors was actually a raft system, and I ended up buying it because I did not really know better.
I also spent a bit more money than I would have otherwise if I had bought everything separately and went the DIY route.
Oh well?
Raft systems are also a good way to get started with hydroponics, though I would only recommend a raft system if you have a large space to grow in.
In a raft system, you have a large reservoir of water(large is relative, depending on how many plants you wish to grow), and you maintain the water level at a constant.
Oxygen is supplied via an air pump and an air stone, and the pump is constant running to always provide the roots with oxygen.
The nice thing about a raft system is that you can have a smaller volume reservoir and plant more things. You will need to top up the water every now and then, as there is no way to get around that. Plants drink water!
To get your raft system working:
- Choose a reservoir and either place a thin sheet of styrofoam on it – the raft – or use the lid of the reservoir
- Drill/cut holes according to how many plants you wish to grow
- Drill a smaller hole to feed your air pump?s(any aquarium air pump will do) pipe through
- Fill up the reservoir so that the bottom of the net cups would touch the water, and add nutrient solution accordingly
- Connect the pipe to your air pump and turn it on – and make sure the part going into the water has a stone or else it won’t sink
- Check the water level every few days and top up as necessary

image credit: Vecteezy
Lighting
Ah, the most critical part of growing indoors: lighting!
Since your plants will be indoors and not receiving regular sunlight, to get them to really grow, you’ll need to provide adequate lighting.
There are LOTS of possible ways to set up some grow lights – and you don’t even need dedicated grow lights, just T5 tubes or CFLs will also do the trick.
The key to understanding lighting is the color of light that is being emitted. The topic of lighting is very complex, but to simplify…
Plants generally need a healthy mix of blue light and red light. Blue light promotes vegetative growth, and red light promotes flowering.
The wavelengths(ie colors) of light are generally marked on the bulbs you buy as the color temperature, measured in Kelvins(k).
For standard leafy greens, a color temperature between 4000 to 6500 is fine. 4000 is an all-round temperature where the light is a good mix of blue and red, and can do really well with leafy greens.
6500 is more towards the blue side, and again is good for greens.
For flowering plants, stick to 4000 and lower. Remember, though, that plants go through different phases. At one point, you’ll want to promote growth, and at another, you’ll want to promote flowering.
As such, you can even change around the lights whenever you wish to induce another stage of the plant?s growth.
T5 tubelights and CFL bulbs are overall good lighting solutions as they?ll do a good job and they’re cheap.
Just make sure the lights are not too far away from the plants: about 1 foot away is the furthest, unless your bulbs get really hot, in which case keep them further to avoid burning your leaves.
Besides your leaves, if you?re using bulbs that get hot, make sure you have an adequate ventilation or cooling system so you don’t start a fire somewhere! The bulbs themselves can be at risk of burning out if you don’t ventilate them properly.
LEDs and tubelights should not be an issue but if you use high pressure sodium lights or something of that sort then heat management will definitely be an issue you’ll need to watch out for.
You can also use LED ?grow lights? which are a mix of red and blue LEDs. They perform well, too. The critical thing is to make sure that all your plants get a good and equal amount of light. If the concentration of light is higher in one spot than another, the leaves will grow towards that spot.
Tubelights are good because the light is naturally distributed a lot more than a single bulb.
Most manufacturers of dedicated grow lights will state how much area a single bulb can cover, and you can refer to that for figuring out how many lights you’ll need.
Setting up a grow tent
Unfortunately one issue that arises with using artificial light is that the light leaks everywhere! Sunlight spreads too, but it is infinitely stronger than your 9W LED bulb, so it doesn’t matter.
One way to get around the problem of light leak is to set up a grow tent. Grow tents reflect light back inside the tent instead of letting it leak outside, which means more light for your plants and more efficiency.
You can buy ready made grow tents online for a wide range of prices depending on how big you want your tent to be, but there are easier, more DIY routes available too.
For starters, you can simply use windshield visors and set them up to stand using PVC pipes. Just put the visors on three sides and on top – you may even be able to cut the visor and re-attach it as per the shape of your growing area.
This is one of the cheapest methods.
Another inexpensive way to set up a grow tent is to order some mylar material from China. Mylar is cheap, and if you get just the film, you can hang it or stick it on anything you like.
Dollar store foamboard works well too and is surprisingly strong when you glue it to other pieces of foam. Just coat or drape the foamboard with mylar and you’ll have a grow box!
If you?re not up for the DIY route, you can certainly pick up a grow tent, too – they?ll be a bit more fancy with some bells and whistles like zippers, they?ll be easily collapsible, and they?ll have air vents.
(You can make air vents by poking holes into the foam or mylar, too).
Grow tents are not absolutely necessary – I grew my first batch for the first three weeks without any reflective material, and with the tubelights about 6 inches above my plants and each plant getting direct light, I got decent results.
Using the grow tent system will of course speed up the process!
Chapter 7: Lessons from my first hydroponic grow
When I first started with hydroponics, I attempted to grow some leafy vegetables: spinach, lettuce, and bok choy.
Of the three greens I planted, I had the most success with bok choy and it seemed to be the most forgiving of mistakes – and I made a lot of mistakes at the start! For beginners, the best vegetable to grow hydroponically in my opinion is bok choy.
Although all three were more or less tolerant of errors, no doubt, but bok choy grew the biggest, fastest, and easiest of the lot.
These are the best vegetables to grow hydroponically:
- Bok choy
- Spinach
- Lettuce
- Swiss Chard
- Mustard greens
- Kale
Like I said above, I feel bok choy is the easiest to grow out of the lot, so I’m primarily going to talk about bok choy, then about the rest.
What is bok choy
Bok choy(also spelled bok choi or pak choi) is a type of Chinese cabbage. The name literally means “green vegetable.” It is a very nutrient dense vegetable, though in extremely large quantities(over 1 kilogram per day), it can be toxic.
How to grow bok choy
Bok choy is a cold weather vegetable, so it is very tolerant of cooler temperatures. From planting, you can expect it to mature within 40 to 45 days – so it’s a fairly quick turnover.
Related: In depth guide to growing bok choy
To start, drop a few seeds into a 0.5 cm deep hole in a moistened coir bundle or rockwool, and place in a humid place. In a couple of days, the seeds should germinate and you should have little shoots.
Within 2 weeks of germination. you’ll see 2 to 3 true leaves. True leaves will have proper veins and will look a lot like the final product, just a lot smaller.
Once you have 2 to 3 true leaves, you can transplant the bok choy into a hydroponic system.
If you’re growing indoors, you’ll want to provide artificial lighting, and at least 14-16 hours of it. I found that giving more light resulted in a better plant.
If you’re growing outdoors, then the plant will be getting seasonal light – the best times to plant are spring for a summer harvest and late summer for a fall harvest.
Use a general grow or greens hydroponic nutrient solution for best results.
Be mindful of temperature – if it is too hot, you can cause the bok choy to go into seed. This is not a major issue, but once the bok choy goes to seed, the leaves will become bitter.
Once the plants are in solution, you’ll just need to keep an eye on them. Make sure they don’t get tangled anywhere, make sure the water is free from algae, and that the roots are healthy.
Within 40 to 45 days from planting, you should have a ready plant.
Even though it’s a cabbage, bok choy does not form heads. You’ll have a bundle of leaves on thick stalks, about 12 to 18 inches high.
How to harvest bok choy
You can start harvesting bok choy, much like any other leafy green once it’s ready by cutting the outer leaves. You can cut off the outer leaves, being sure to leave inner leaves intact. Within a few days, the outer leaves will grow back, and you can harvest again.
You’ll be able to do this 3 to 4 times.
Of course, if you want a larger harvest in one go, you can simply chop off the entire plant, too.
Indoor greens pitfalls
My first attempt at growing bok choy was not entirely successful. Out of all the plants I grew, bok choy was comparatively the best but it was nowhere near as healthy as I had hoped. There just weren’t enough leaves and the stalks were quite thin. The roots were also not as thick as you’d expect.
There were a number of reasons for this:
- I was not able to put the seedlings near sunlight in enough time as I was out of town over the weekend, so by the time I got to them, they were already quite long and spindly.
- My initial grow light setup was not optimal – I had a tote with 12 plants in it and only 3 LED bulbs suspended over the center of the tote in a line. As a result, the plants on the side began growing in towards the center where the light was
- I then replaced the bulbs with LED tubes, but I think the tubes were just not bright enough and the lower light levels were responsible for the plants having stunted growth.
Overall, I think light was the main issue. To get around this, my next grow will be exclusively outdoors (the rainy season will have passed, too).
Taste and quality of my first grow
I managed to salvage my first grow by placing it out on the terrace. Even though it was west-facing and only received 3-4 hours of direct sunlight(if any, otherwise filtered through clouds), in the 10 days I put it outside, there was a huge transformation.
Granted, my lettuce plants all died before I had a chance to take them out, but the bok choy and spinach was slowly trudging along. After placing them outside, the bok choy leaves grew much bigger, the stalks thickened, and they started to look a lot more like proper bok choy plants instead of the wiry leaves I had before.
They tasted fantastic, too. For my first harvest, I cut off the outside leaves and left the inner leaves intact to promote new growth. Hopefully, I will be able to harvest again in one week. I am writing this post right after my first harvest, as a matter of fact!
Just by switching the light to natural sunlight, the roots grew better, the leaves grew better, and the stalks thickened, too. If your plants are not doing well, the first line of defense is ascertaining whether they are getting enough light or not.
I am planning on letting these plants go to flower, if possible, so I will have a fresh supply of seeds for my next grow.
What about the other veggies?
The other vegetables I noted at the beginning of the post: lettuce, spinach, swiss chard, and so on grow very similarly to bok choy. The germination and transplanting process is the same, and you’ll see results within 30-45 days.
For an initial grow, an indoor grow shelf, or a kitchen setup, the easiest plants are leafy greens.
Leafy greens do not need to flower before they are good to harvest – flowering plants become more complicated because the light requirements are more sensitive and there is the question of pollination.
Leafy greens can get away with receiving less light overall(though if you’re using artificial grow lights, it’s best to give as much light as possible, 16 hours per day is optimal).
The key is having strong, stout seedlings before you transplant. If the seedlings are too spindly, the plant will not have a strong base to grow on and that will be the start of all of your troubles.
You can recover a plant mid-grow, though, by improving your lighting conditions. A thin plant will start thickening up and producing stronger leaves as soon as it receives more light.


![10 Songs With an Eco-Friendly Message [For Earth Day]](https://sustainabilitymattersdaily.com/wp-content/uploads/2019/03/eco-friendly-lyrics-thumb-768x384.jpg)